Related: Restriction Cloning, ICM - Assistante Ingénieur
Free and full version of snapgene.
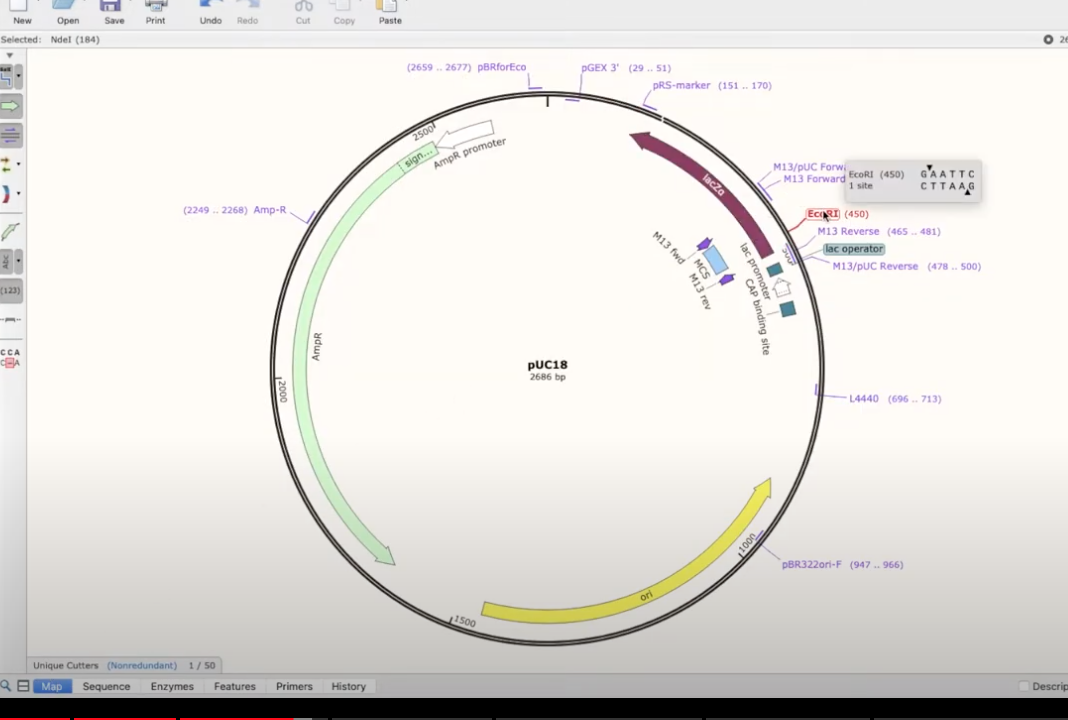
How to open and view DNA file
- can download a plasmid file from addgene, option to download the snapgene file
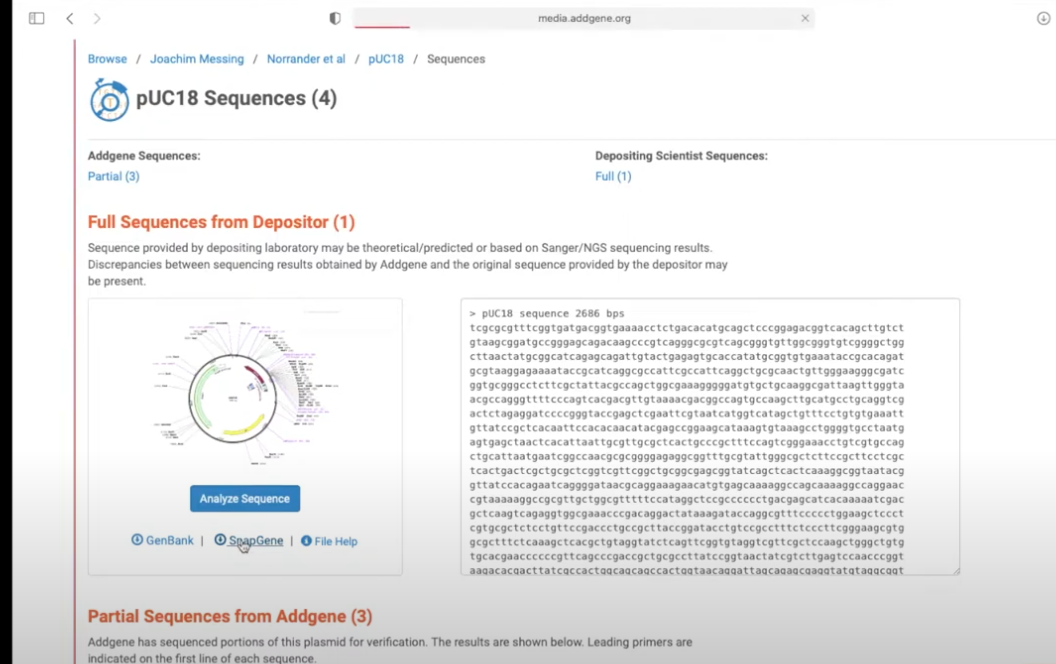
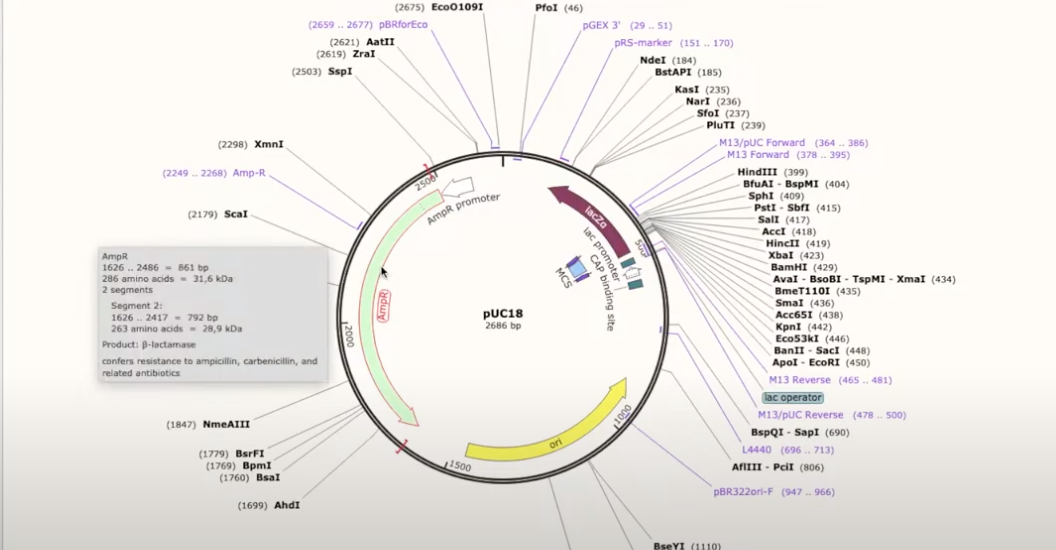
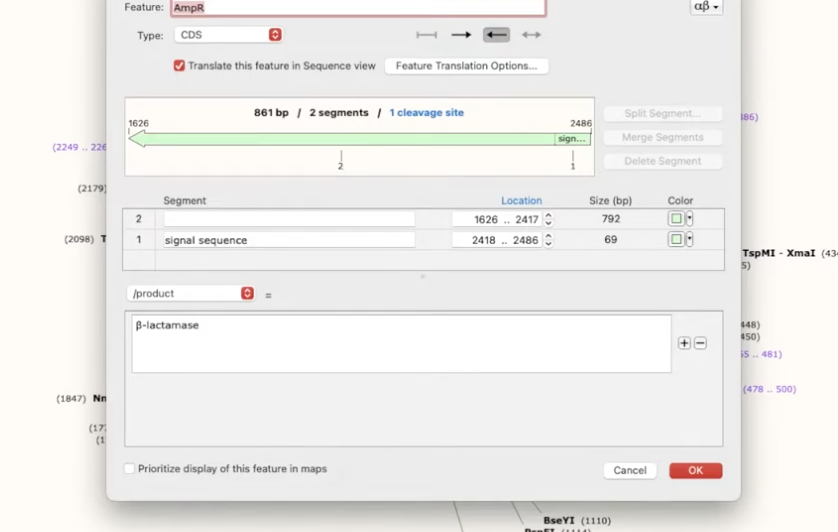
- double clicking on a part of an annotated plasmid will show what it does
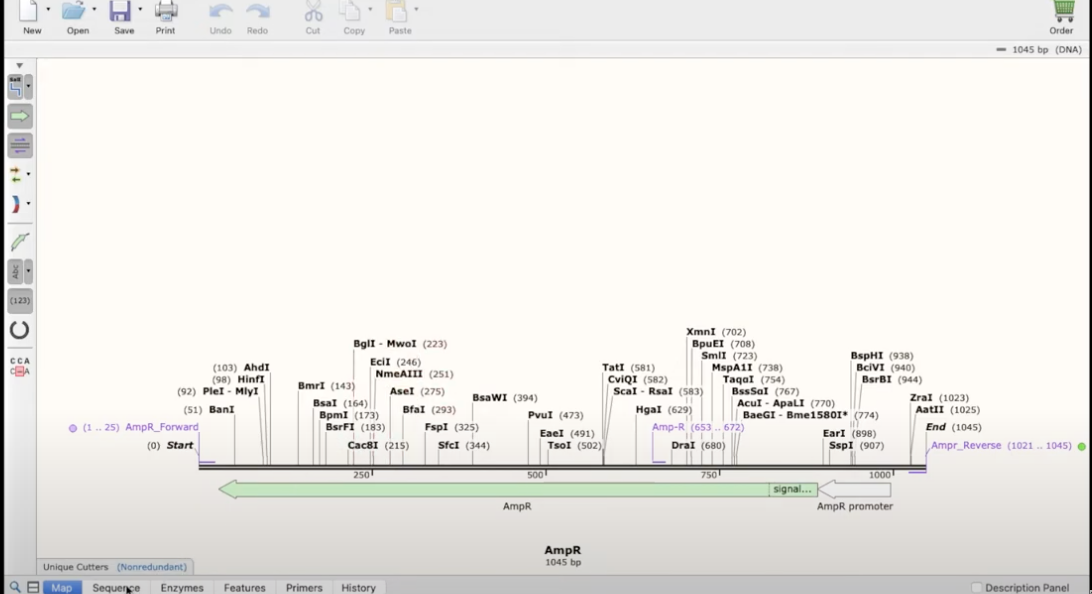
View restriction enzymes and using different sets
The enzymes tab at the bottom of the screen
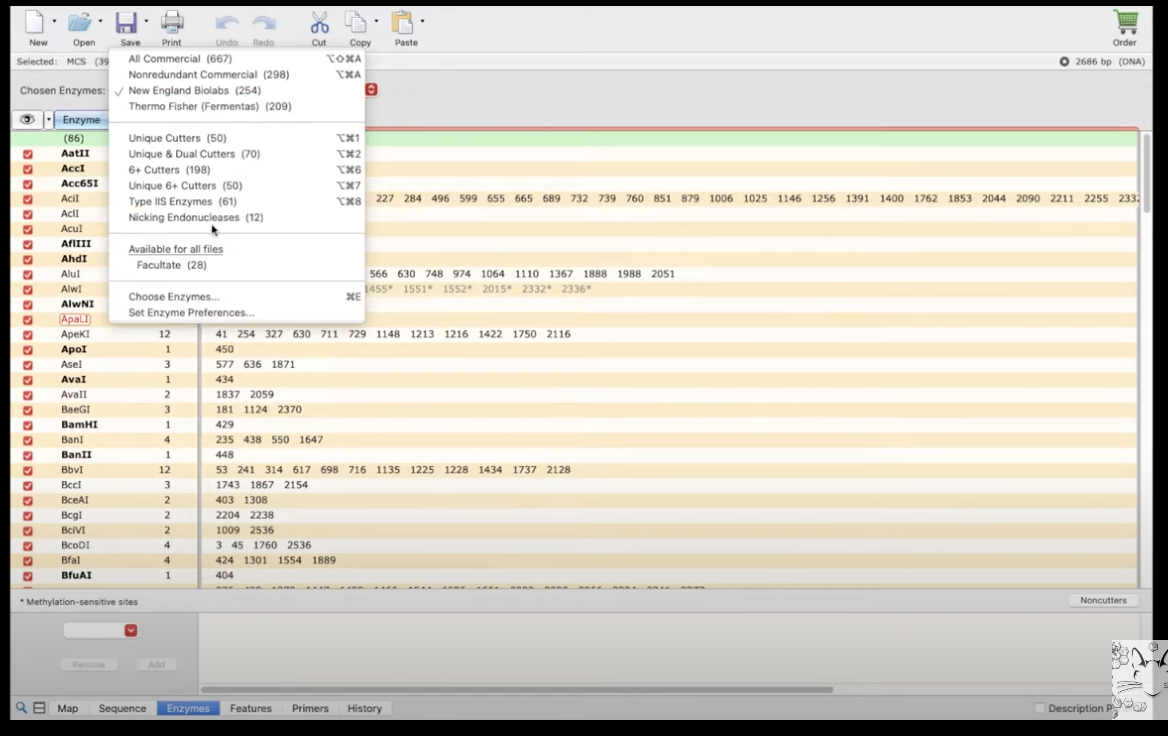
- enzymes (left column) are shown with their position (right column)
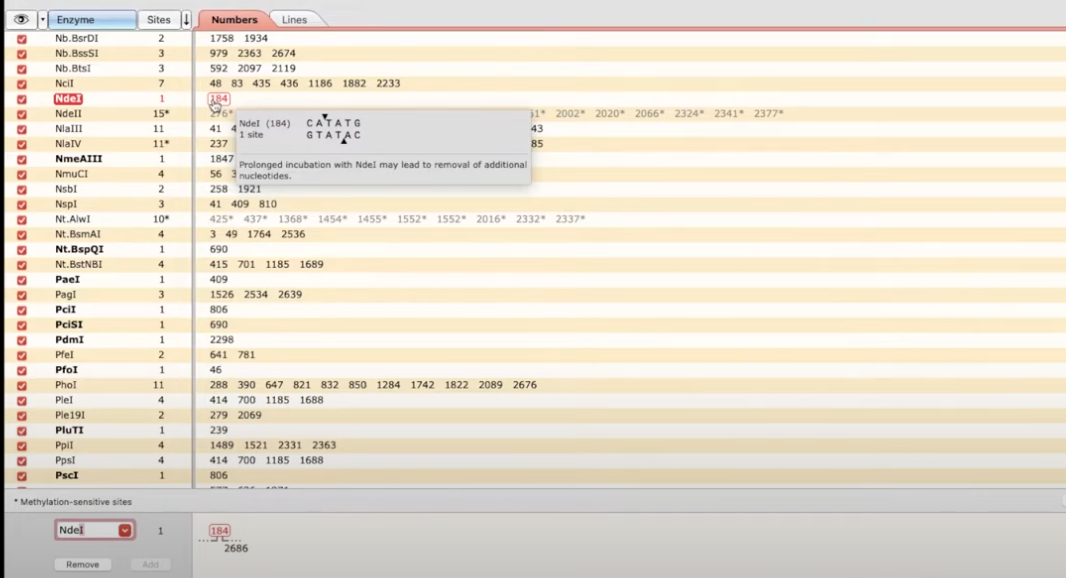
- you can also choose to hide enzymes, and select individual ones to show on the map
play around with the enzymes panel! there are lots of great views from it
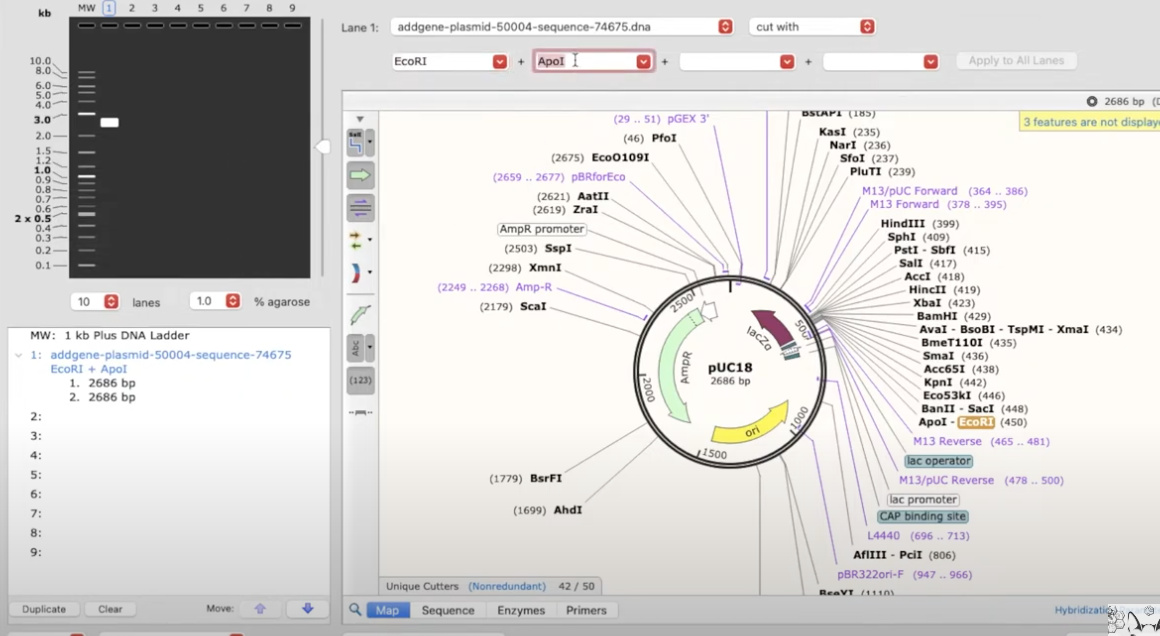
simulating an agarose gel electrophoresis
- Tools>Simulate agarose gel
- select parameters in the dropdown and it will show what an agarose gel will look like on the lefthand panel
add primers and simulate PCR reactions
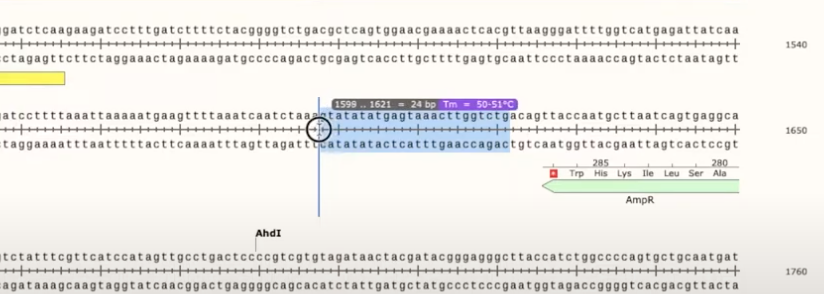
Primers show up in Snapgene like half arrows, and some genes come pre-coded
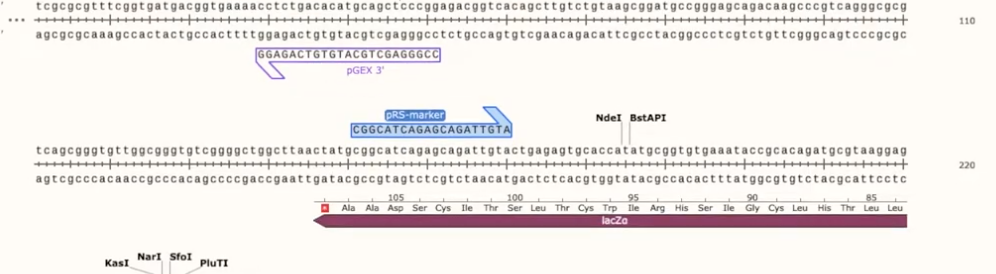
- can drag over basepairs to select primers, and it will show you the number of bp and the melting temp of the primer
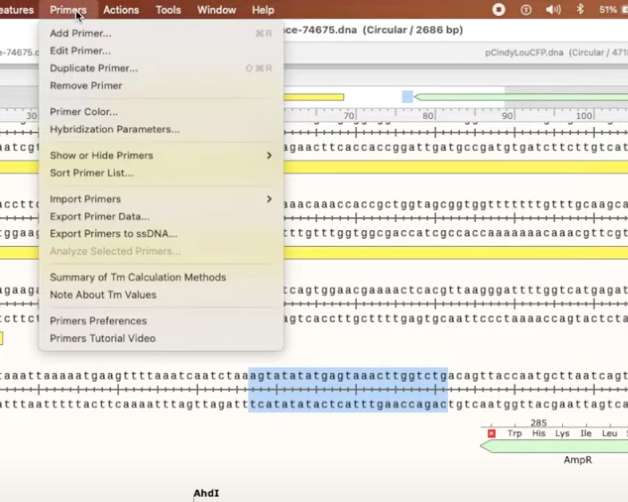
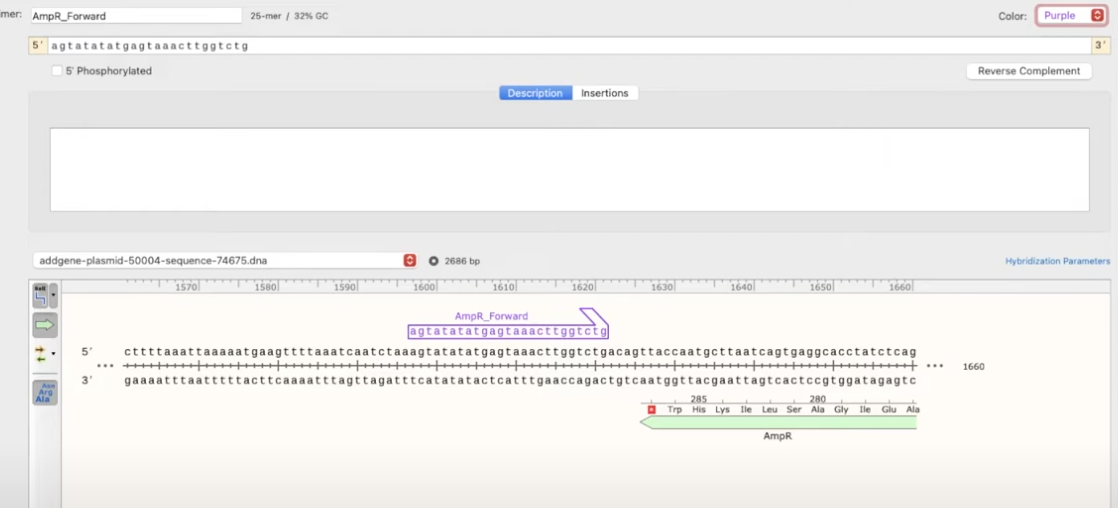
- to create it as a primer, click Primers>Add primer>Top/Bottom strand
- Top = Forward
- Bottom = Reverse
- after that you can choose to add the reverse complement and even hybridization parameters (number of bases at the 3’, minimum melting temp, show additional binding sites that do no match the 3’ end of the primer but match at least x bases at the end of 5’, etc.)
- to simulate PCR, CTRL+click on the fwd/rev primers in the plasmid, then Tools>PCR
- choose primers used in the PCR
- it will show on the right-hand side what region is amplified + the product size
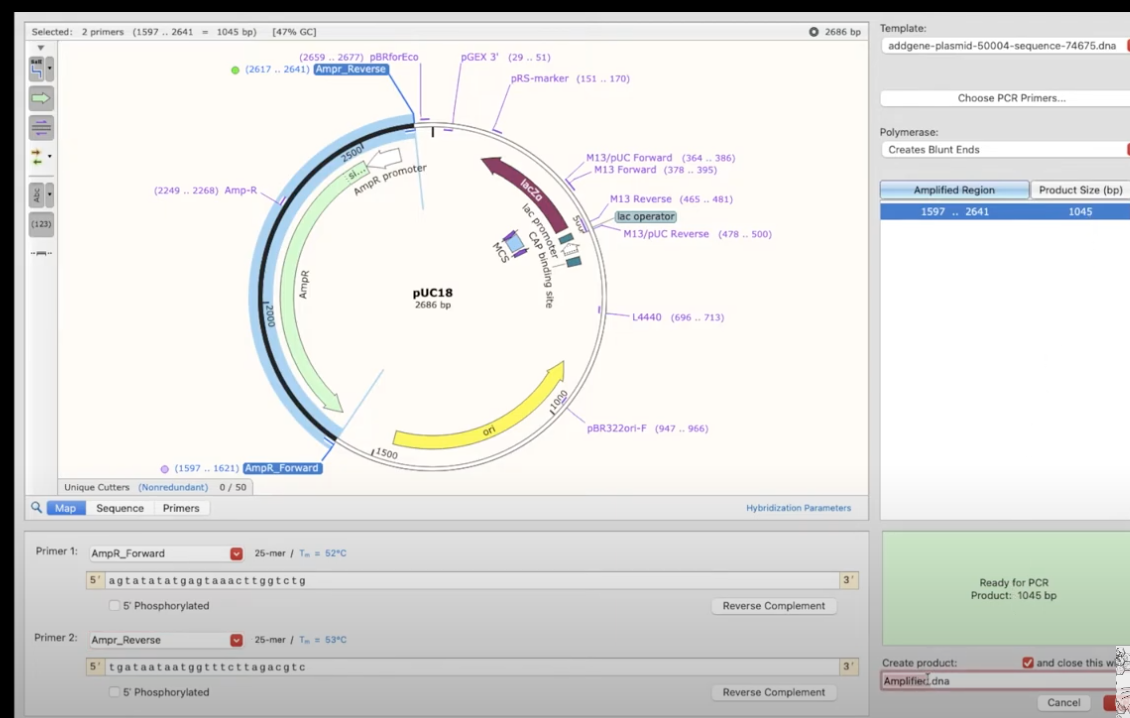
- Run PCR → it will show the fragment amplified, including all the other enzyme sites. this pops up as a new window, and it shows a full history etc.
how to simulate a mutagenesis
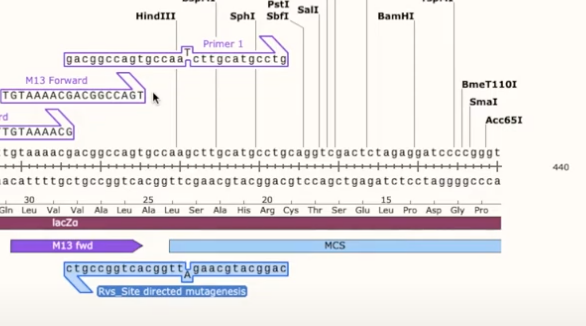
- site directed mutagenesis
- find a site (a couple of basepairs) in the plasmid to replace one nucleotide
- create a primer that goes over that site and replace 1 nucleotide in the primer (it will visually show the strand not annealing)
- then click on that primer, copy it, and add the reverse complement as a reverse primer
- now you want to visualize how the site will look after mutagenesis, go to Tools>Actions>Mutagenesis

how to simulate a cloning reaction
- take a look at the plasmid and for multiple enzyme sites, you replace that sequence with your cloned insert
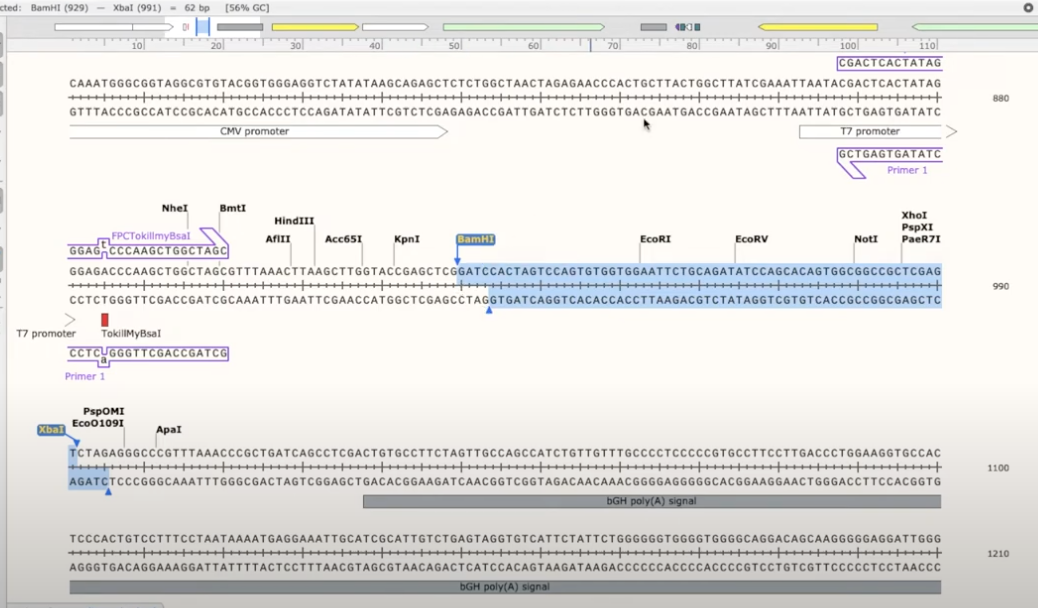
- if you want to clone in the CindyLouCFP gene, you’d want to amplify the CindyLouCFP gene using primers that you need to use in the restriction site
- in this example, you’ll need to insert BamHI into the fwd primer and XbaI into the reverse primer
- you can do this easily by right-clicking the primer and copying the recognition sequence
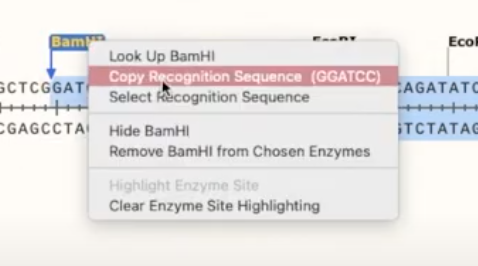
- go to the plasmid with the desired insert, click on the primer you’ve created there, and paste the recognition sequence at the very beginning
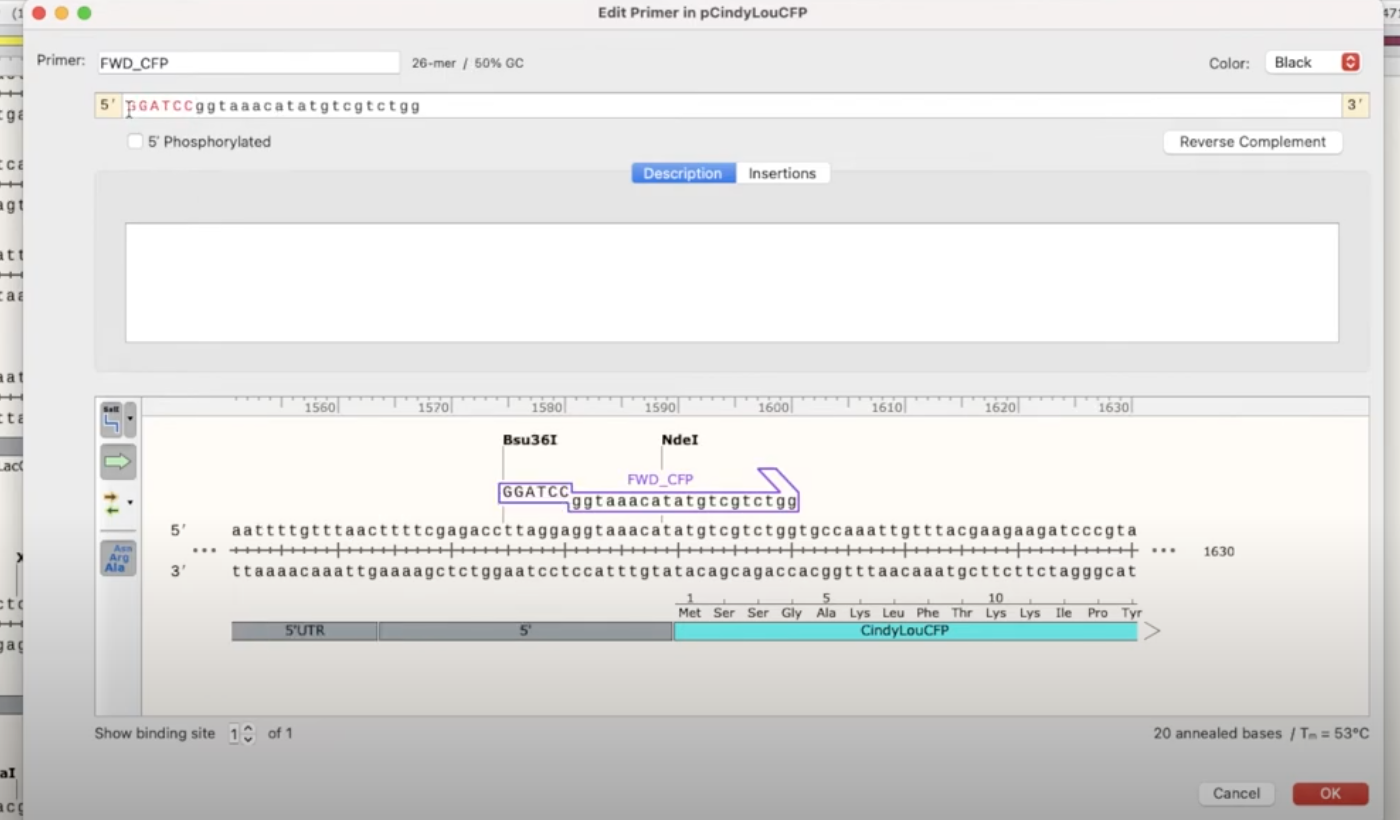
- you’ll also need to add a couple of nonsense base-pairs to allow the primer to come and cut
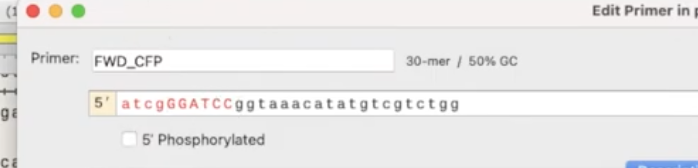
- repeat for the rev primer that needs to be added on the other end of the insert plasmid. when you add the nonsense bases make sure you’re adding them on the 5’ end for each primer
- when you’re creating primers, pay attention to temperature. They should be at or around the same temperature so they can denature properly
- visualize it and you’ll the see the PCR product
- Actually visualizing the insert
- in a snapgene window (doesn’t matter which one rn), Actions>Restriction and Insertion Cloning>Insert Fragment
- Choose vector (dropdown menu) with the proper snapgene file.
- if the file was just open, it should show up at the top under Open DNA Files
- Choose the enzymes you’ll be using to cut it
- Choose insert with the proper insert snapgene file
- choose enzymes - they should be the exact same as the insert!
- rename it if necessary
- Clone → shows what the final map should look like!
- then you can simulate agarose gel for this as well to check on what it should look like when it’s run